Showing posts with label kids' art. Show all posts

Monday, January 27, 2014

Planking (Walls, Not People)

In case you thought I had turned into some extreme body planker over the weekend, I thought I had better clarify that I am talking about walls and not making my body completely straight while lying in random spots--not that there's anything wrong with that. I just haven't gotten around to it lately.  But, let's talk walls...

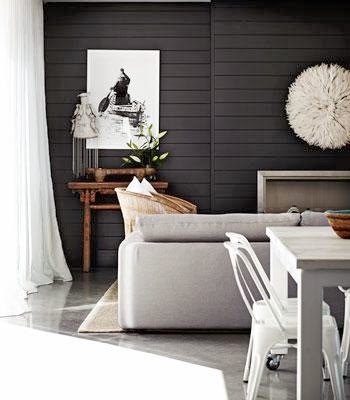
I love the way a planked wall gives interest and texture to a space, and I think the black planking is especially chic. It takes the cottagey (which is so not a word) vibe to a whole new level.  And I think I like taking things to a whole new level, don't you?
image from Judith Balis Interiors via Houzz
image from Room Zaar
image from Real Living

Monday, September 23, 2013

[in five + one]: Favorite ABC Products & Ideas

Hey there! I hope you all had a good weekend. Even though Mr. Hubs was mostly MIA with trips to the hospital, golfing, and football games, my mom, Stella and I had some girl time, and we got to spend Sunday with even more family, so that made up for it. The highlight of the weekend was Stella taking part in her first Primary Program at church. (The Primary is children's organization in my church.) Instead of singing the songs, she spent most of the time giving my niece, Sloane, the stink eye and folding her arms in full pouting position, because Sloane was eating Stella's snacks from her church bag. I must say, it was quite entertaining. Now onto our ABC's...

I love a great ABC product for a kid's space and even for a common living space--that's why I like them to be cute! ABC's are classic and timeless, and let's be honest, the idea of the gold letters is just plain chic. Here is a list of my top six (even though the series is supposed to be [in five]) favorite ABC ideas and products.  Links are included below each picture.
Gold ABCs from Uncovet (This image is of jewelry, but the idea on Pinterest is to buy letter magnets and spray paint them gold.)
Classic ABC Blocks from Uncle Goose
Stella's ABC Flashcard Art | Flash cards can be purchased from Amazon
Paul Thurlby's Alphabet Book
 Printable Polka Dot ABC Cards from Yellow Mums via Etsy
image from Orange You Lucky | Magnets can be purchased from Amazon

Thursday, April 11, 2013

[so cheap, so easy]: Salvaged Wood Tree

During my little computer clean up, while I should have been doing something remotely productive, I also found this image. Adorbs, right? I love this idea, and I especially love the simplicity of the dark, repurposed wood against the white background. Love. It. And now, I think I will spend some time on Pinterest or Facebook or anywhere else I can waste time instead of working on my lesson for Sunday.  What can I say? I'm on a roll.
image from Design Sponge

Linking up at Imprintalish

Thursday, March 28, 2013

[so cheap, so easy]: Monochromatic Names

Sometimes Pinterest and this wonderful thing we call the World Wide Web make us think we are over things, because we have seen them so many times. Case in point: monograms and children's names on walls. I love Stella's "S", and I love the idea of a personalized space...I've just seen it so many times, that I'm ready for something different. You? How about painting your letters the same color as your wall? I'm really digging the simplicity and texture it brings to a space, and letters are super cheap and easy to find. What do you think? I love it. And, because I care, I saved you some time: bibliotheque (bee-blee-aw-tek) means library or bookshelves. I can't possibly be the only one that didn't know that, right?  Once again, the fact that I quit french after seventh grade bites me in the butt...
image from Erik Olsson via 79 Ideas
image from Houzz

Thursday, September 6, 2012

[so cheap, so easy]: ABC Flashcard Art

In case you missed my tutorial on UCreate, here it is right here on my own blog for your viewing pleasure. And, before I start, here's my disclaimer: the only reason I can truthfully call this project easy is because I mostly watched Jeremy put it together. I'm pretty good at that, so it was quite easy.  For those of you who rule with power tools, it didn't look that hard (haha...famous last words). Anyway, on with the tutorial. 

I ordered these vintage ABC flashcards a while ago not knowing what I was going to do with them. When it was time to design my daughter Stella's big girl room, I knew I had to somehow incorporate them. And, since the cards were going to take up a lot of space, I needed something that wasn't too heavy...enter ABC Flashcard art!

I first decided on the size and layout I wanted. I chose a 7x4 layout (leaving just two cards on the last row).  Once I laid out the cards, I decided on a 30x60 frame, which allowed adequate room for spacing and the clothespins.

Once the frame was assembled, it was time to drill holes.  Measure for holes and drill away (or watch, like I did). Make sure the holes are big enough to thread your twine through.

I painted the assembled frame in Restoration Hardware's Silver Sage and sanded the frame. I then drew on the pinstripes with a white Sharpie Paint Marker (love these)!  Next: the threading. This was definitely the trickiest part of the project, since I wanted the tension on the twine to be super tight. If you don't mind a little sag, then it's not so tricky. Thread your twine through one side, tying a knot on the end. Then thread it straight across to the other side. Mr. Hubs used some type of surgeon's tool to keep the tension tight (he brings home all sorts of nifty tools), but a pair of pliers would probably get the job done. Tie the knot on the opposite side and repeat until all rows are complete.

Here is the frame before the cards were placed. I like this piece, because I will be able to replace the ABC's with photos when Miss Stella gets a little bit older, or more likely, when I get sick of the ABC cards!

Here's a close-up of the flashcards pinned to the rows of twine.

 And finally, here is the ABC Flashcard art in Stella's completed room.

Linking Up at the following:

Wednesday, August 1, 2012

The Big Reveal: Stella's Room

Can you even believe that I am FINALLY done with this space? I strayed a little bit from my original design board, but overall, I stayed with the same overall feel and color palette. Most importantly, Stella likes it, but according to her, it's not cute. It's fancy. I also heard her thank Heavenly Father for her pouf, dot pillows, curtains, and baskets in her bedtime prayer.  We obviously take our interior design very seriously around here! 
I nixed painting the entire room and went with a white stripe on one wall. This will be much easier to cover up when we move in less than a year. Plus, the hubs thinks he was actually right on this decision. Works for me.
Stella's table, chairs, and puzzles. All of the other toys are in the closet.
Little Miss needs a step stool to get up to the bed, and there's that pouf that she's so thankful for!
Here's a view from the door.
I made some low hanging hooks for Stella's big tote full of little, junky toys. Keep them out of sight!
Her ABC art--all I did on this one was design it and watch Jeremy build it. He must really love me!
This is a small wall facing the door.
A close up of the ABC art. I kind of love it!
Stella's now white armoire--home to her "fancy pig."
Here's a view from her bathroom, including her growth chart (tutorial from Cozy. Cottage. Cute).
Here's the best I could do to get a picture of the entire room. The armoire is on the wall opposite the window.
Here's the wall opposite the window.
And finally, the last picture--a view of the floral prints.

Thursday, July 26, 2012

[so cheap, so easy]: Vintage Number Sign

So...remember when I said I was SO close to being done with Stella's room? Yeah, sorta wasn't the case. I promise I wasn't lying, rather just clueless as to how long everything takes as well as how many times I would change my mind. You see, my hired help has this other gig doing anesthesia at the hospital. His schedule has really gotten in the way of my plans. I guess you get what you pay for.

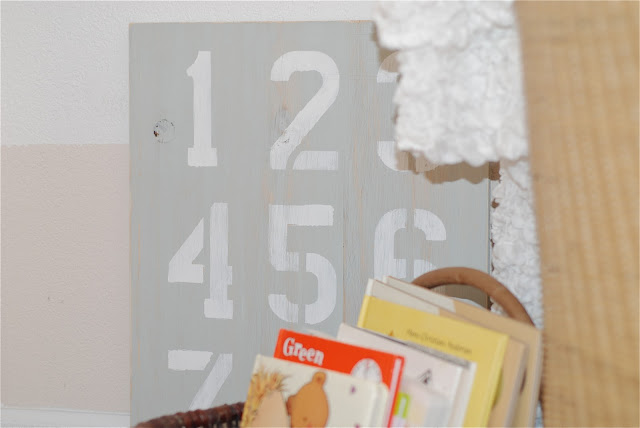
I made this vintage number sign in about .2 seconds using leftover wood, number stencils from Hobby Lobby, paint (I used Restoration Hardware's silver sage (my all time favorite color) and a white that I'm too lazy to find the name for). I painted the wood, taped the stencils on, then filled them in with white using a stipple method. Once the stencils were removed, I heavily sanded the top, sides, and corners. It's not a main piece in Stella's room, but more of an afterthought AND a teeny, tiny sneak peak into her big girl room! 


Thursday, March 22, 2012

[so cheap, so easy]: Flash Card Signs

I didn't have the time energy to make any projects this week, but the good news is, Stella has not had any accidents since day one of potty training. Today was day three, and she would just tell me when she had to go. No timer, but I still frequently asked her if she had to go potty. Next step: taking her out in public. Scary stuff!

I came across this project on Honey We're Home. I love the project so much that I already ordered the flashcards, even though I have nowhere to hang them! I'm sure I'll find a place for them eventually! If not, Stella's room will get a makeover centered around these things! Unfortunately (for Jeremy), I'm kind of serious about that. For right now, I'm sure he thinks they're for learning. Nope. Decorating. Let's get our priorities straight. I mean, really, we shouldn't hamper my creativity, right? I knew you were on my side. For full details on this project, go here.
image from Honey We're Home

Tuesday, August 23, 2011

I Need the ABC's to Motivate Me

I know, it's a suh-weet rhyme. I've really gotten in touch with my inner gangsta rapper since living in Milwaukee and St. Louie. Anyway, I am loving the idea of an ABC display in a nursery so much that I'm already planning on using this idea in our next nursery. What's wrong with this plan, you ask? Nothing besides the fact that, as of now, there is no next nursery.

You see, the hubs and I are planning on adopting a second child, and even as I type, the big red adoption folder taunts me. It sits on my desk judging me, because I am a procrastinator. So, here's my new goal: I am going to work on the adoption for 30 minutes every day. That's doable, right? Totally doable. My goal is to be eligible by the end of the year. That gives me about four months. Like I always say, "so cheap, so easy!"
image from Project Nursery

image from Ohdeedoh

image from House of Turquoise

Thursday, June 2, 2011

[reader request]: Displaying Kids' Art


We all love a new masterpiece or two from our budding artist children, but sometimes our refrigerators and other display areas get a little out of control! That only drives us to be sneaky and "file" the artwork at the very bottom of the trash can where it will, hopefully, never be found! You know you've done it before! You can't keep everything, but don't worry. I found some great solutions for your favorite artwork!
Kellie, one of my gal pals from St. Louis requested a post on displaying kids' artwork. She wanted to find a solution that wasn't too casual. While framing kids' work looks great, it's sometimes not realistic to keep it up to date when you are getting new masterpieces on a daily basis! I found these solutions that I love. They are easy to change, and they look clean and organized, keeping with the tone of one's home. I love the idea from Urban Cottage Living--using curtain rods and clips. You could do three rows of these (or maybe one rod for each child) and have an entire art wall! Kellie, thanks for your request, hope this gives you inspiration!
image from Urban Cottage Living
image from Mondo Cherry

image from The Stir
*If you would like to be featured in the [reader request] series, please email me at jamiejjoyal@gmail.com or leave a comment in the comment section with your request and where you live. I will do my best to accommodate your requests, but not all requests will be featured.